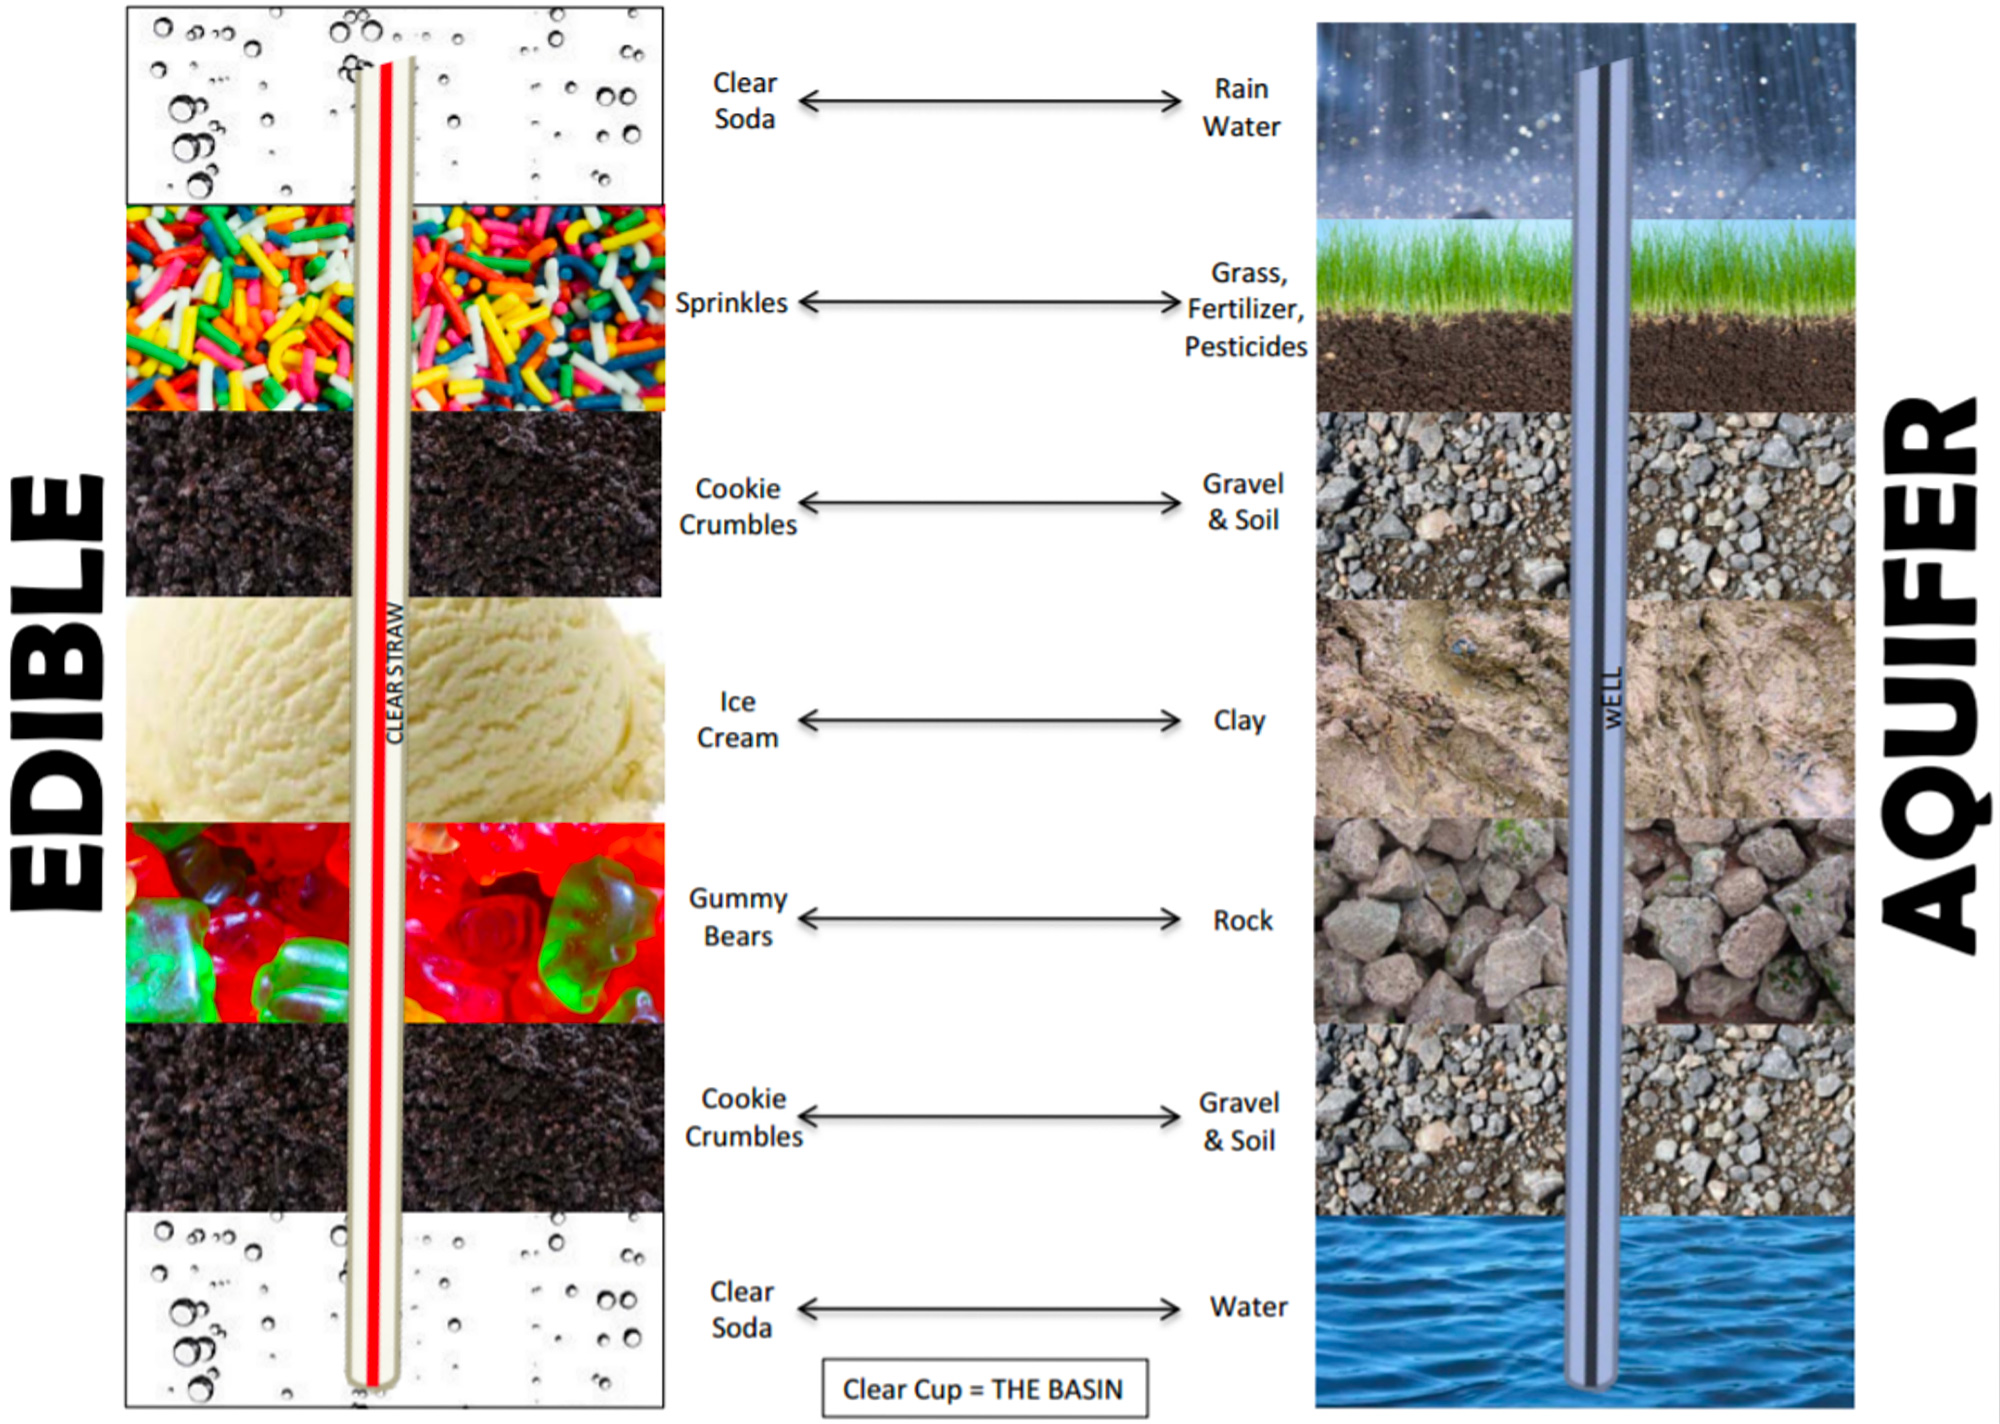
It’s Your Turn to Make an Aquifer You Can Eat. Yummm!
Now that you have heard Reanette talk about the aquifer, how pollution can get into groundwater and how our actions can affect groundwater and drinking water let’s build an edible aquifer.
Follow the steps below, or download the 2-page pdf and print it out.
Materials List
- Sprinkles
- Crumbled cookies
- Crushed ice (the smaller the better)
- Vanilla ice cream
- Clear soda pop
- Colored soda
- Small gummy bears
- Clear drinking straws
- Clear plastic cups (12 or 16 oz)
- Spoon
- Ice cream scoop
Build an Edible Aquifer Steps
Click each step below to expand instructions.
1. Begin to construct your edible aquifer
2. Add enough soda to just cover the gummy bears
The soda represents groundwater. Notice that the soda fills the spaces between the ice, cookie crumbles and gummy bears. The aquifer is now saturated with soda. It is a “saturated zone.” In an unconfined aquifer, the top of the saturated zone is called the “water table.”
3. Add a layer of ice cream
The ice cream serves as a “confining layer” over the water-filled aquifer. This layer, called a “confining layer” or an “aquitard” is impermeable or significantly less permeable than the aquifer below. It is difficult for water to soak through. The aquitard helps protect the aquifer from contamination and is usually made of rock and/or clay. The Spokane Valley Rathdrum Prairie Aquifer is an “unconfined aquifer.” This means there is nothing to protect our groundwater from contamination except our community members working to put their waste in the right place and not on the ground. “Don’t put anything on the ground that you don’t want to drink”.
4. Add cookie crumbles
5. Add sprinkles
6. Sprinkle colored soda over the top
7. Drill a well into the center using your straw
8. Slowly begin to "pump" the well by sucking on the straw
Watch the decline in the level of the clear soda and observe what happens to the contaminants. Do contaminants leak through the confining area (ice cream) and get sucked into the well? If so, do more contaminants get into wells in confined or unconfined aquifers?
9. Pour a small amount of soda over the top
The soda represents precipitation. It recharges the aquifer (adds new water). Watch how the colored soda moves into the aquifer. The same thing happens when contaminants are spilled on the ground. Do you think you could get the colored soda back out of the clear soda?

